A car brake system is built from two main sub systems, disc brakes and drum brakes, plus a set of shared hydraulic hardware that links the brake pedal to every wheel. The disc brake side is made of a brake rotor, brake pad, and brake caliper. The drum brake side is made of a brake drum, brake shoe, and wheel cylinder. Around these core parts sit the master cylinder, brake lines, and brake fluid, which together move pedal pressure to each wheel. This guide explains what each part does, how disc and drum layouts compare, and where automotive brake pads and other AUTOMOBILE BRAKE PRODUCTS fit into a complete braking circuit.
Drivers researching this topic often search using slightly different wording, such as brake system parts list, parts of car brakes, diagram of brake parts, vehicle brake parts, or car brake components. All of these questions point to the same underlying system, and this article works through every one of them section by section, starting with the two basic brake layouts and moving into individual components, wear patterns, and a full parts reference table.
The Two Main Types of Car Brake Systems
Every wheel on a passenger vehicle is slowed using one of two friction layouts. Understanding which parts belong to which layout is the fastest way to make sense of a car brake system parts list, since a disc brake assembly and a drum brake assembly share a similar purpose but use different hardware.
Disc Brake Components
Brake rotor, a spinning metal disc attached to the wheel hub
Brake pad, the friction material that clamps onto the rotor
Brake caliper, the housing that pushes the pads against the rotor
Drum Brake Components
Brake drum, a hollow metal cylinder that rotates with the wheel
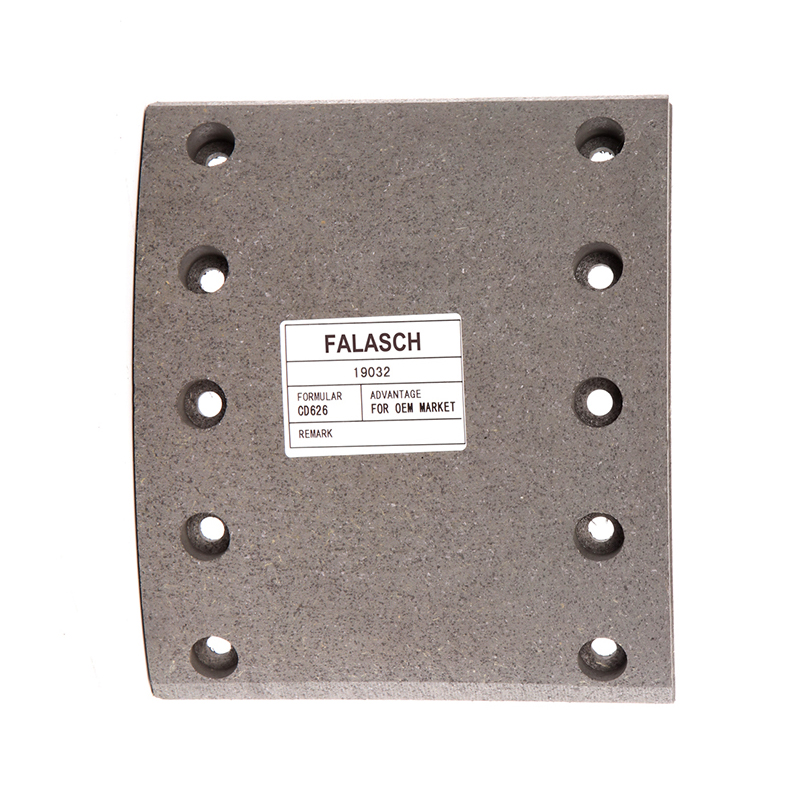
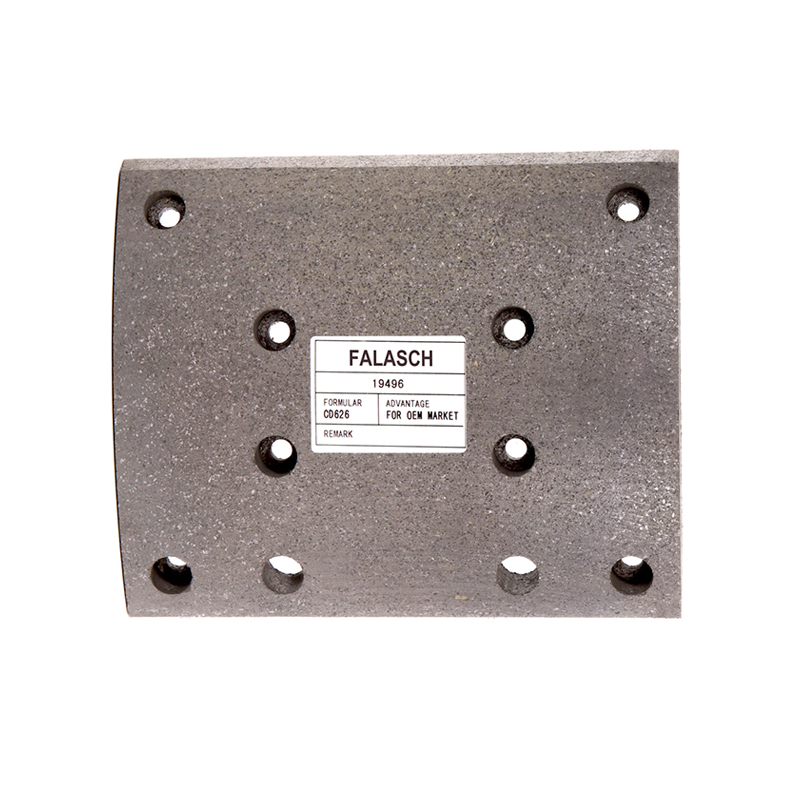
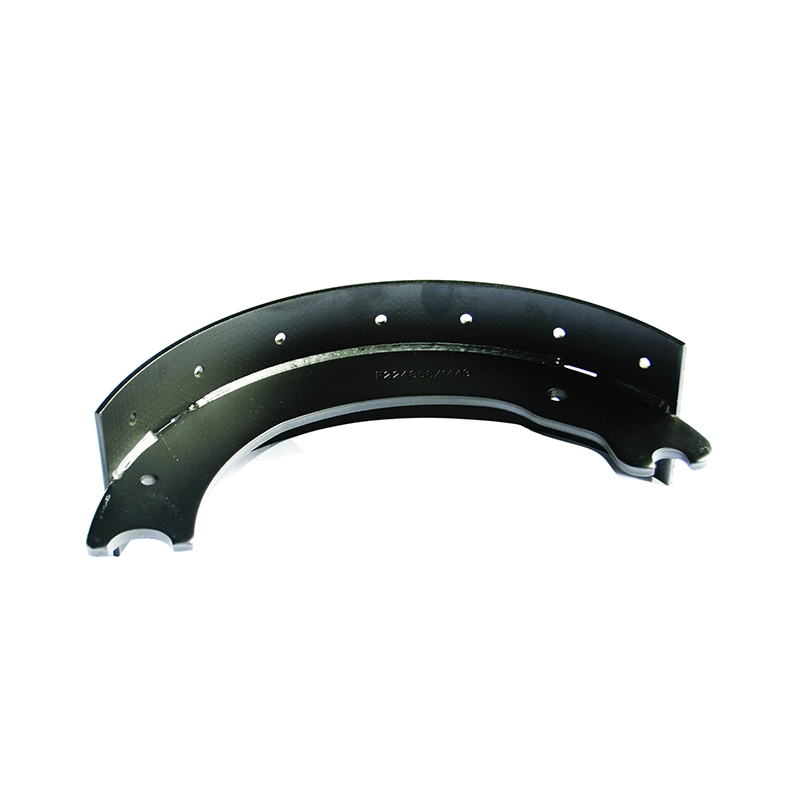
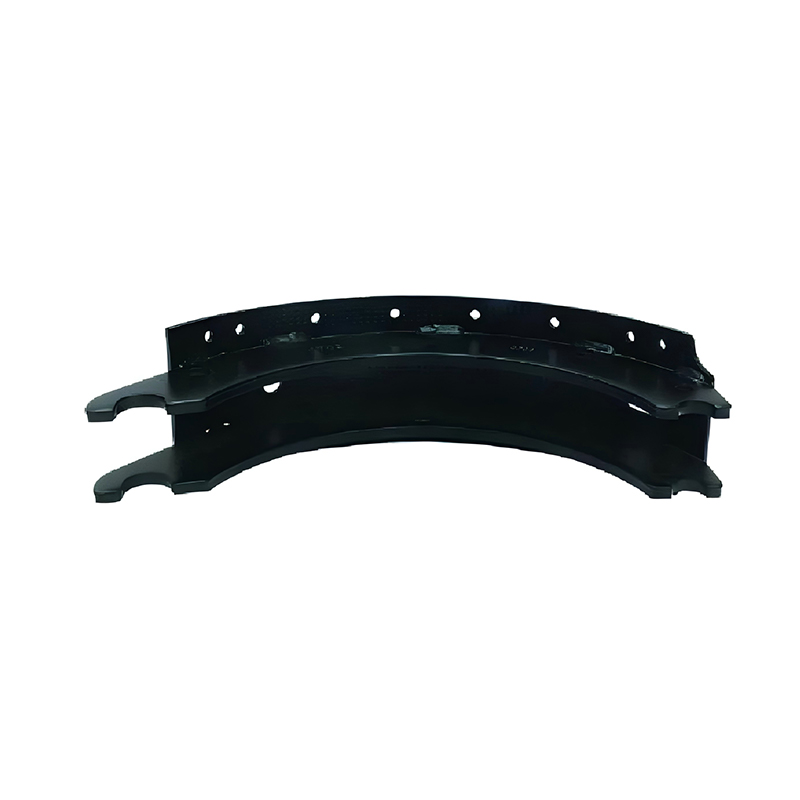
Brake shoe, the curved friction lining pressed outward against the drum
Wheel cylinder, the hydraulic piston that pushes the shoes outward
Beyond these wheel end parts, a complete braking circuit also depends on shared hardware and accessories, including the master cylinder, brake lines, and brake fluid. These shared components carry pressure from the pedal to whichever wheel end layout the vehicle uses, and they are just as important to overall stopping performance as the rotor, pad, drum, or shoe. The sections below look at each of these components individually before moving into a full comparison table.
Disc Brake Components: Rotor, Pad, and Caliper Explained
Disc brakes are the most common front brake layout on modern passenger cars, and on many vehicles they are used at all four wheels. Where are the brakes located in a car? On a disc brake vehicle, the rotor and caliper sit directly behind each wheel, visible through the wheel spokes on most rim designs.
Brake Rotor
The brake rotor, also called a brake disc, bolts to the wheel hub and spins with the wheel. Its flat, machined surface gives the brake pad something to clamp against. Rotors are usually cast iron, and many front rotors are vented internally with cooling vanes between two friction faces to help shed heat generated during repeated braking.
Components of a Brake Caliper
The brake caliper is the housing that straddles the rotor and squeezes the pads inward when the driver presses the pedal. A caliper is built from several smaller parts working together:
Caliper body or bracket, which mounts to the steering knuckle
One or more pistons, which move outward under hydraulic pressure
Piston seals and dust boots, which keep fluid in and debris out
Slide pins or guide pins, which let a floating caliper shift side to side
Caliper bolts, which secure the bracket to the knuckle
Calipers are generally built as either fixed or floating designs. A fixed caliper has pistons on both sides of the rotor and does not move, while a floating (or sliding) caliper has pistons on only one side and slides on guide pins so both pads contact the rotor evenly. Floating calipers are widely used on everyday passenger vehicles because the design is simpler and lighter, while fixed calipers are more common on performance oriented applications.
Parts of a Brake Pad
A brake pad looks simple from the outside, but it is a layered assembly. The main parts of a brake pad include:
Backing plate, a rigid steel plate that the friction material bonds to
Underlayer or shim, which helps insulate heat and reduce vibration
Friction material, the compound that actually contacts the rotor
Wear indicator, a small metal tab or sensor that signals when the pad is thin
This layered structure is why automotive brake pads are sold as a matched set rather than as a single block of friction material, and why pad thickness is the main figure technicians check during a routine inspection.
Drum Brake System Parts: Drum, Shoe, and Wheel Cylinder
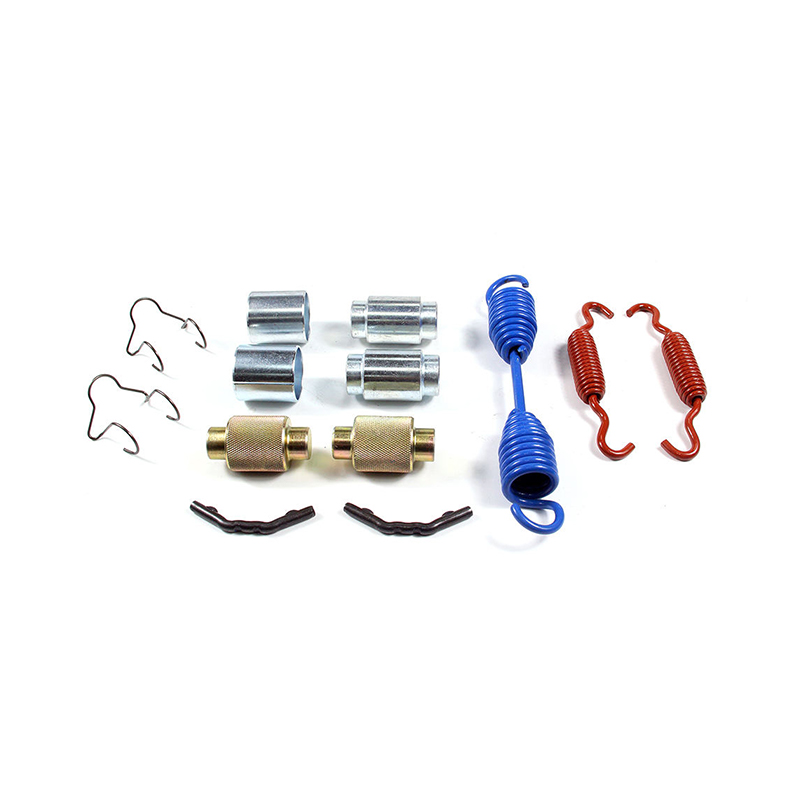
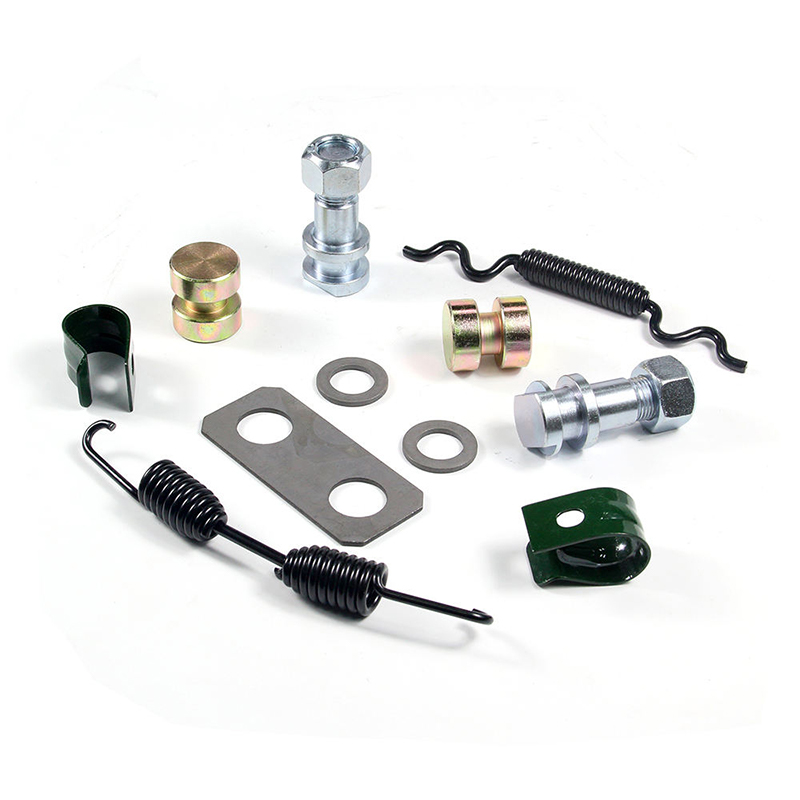
Drum brakes remain common on the rear axle of many compact and economy vehicles, largely because the layout is simple, inexpensive to produce, and works well for integrating a mechanical parking brake. The parts of a drum brake system are different from a disc setup, even though the underlying goal is the same.
Drum Brake Part
Function
Brake drum
Rotating housing that the shoes press against from inside
Brake shoe
Curved friction lining that contacts the inner drum surface
Wheel cylinder
Hydraulic piston pair that spreads the shoes outward
Return springs
Pull the shoes back away from the drum after braking
Self adjuster mechanism
Takes up slack as the shoe lining gradually wears
Backing plate
Fixed steel plate that holds the whole assembly to the axle
Core parts of a drum brake system and what each one does
Because the shoes sit inside an enclosed drum, this layout sheds heat more slowly than an open disc brake, which is one reason many manufacturers reserve drum brakes for rear axles, where braking load is lighter than the front axle under normal deceleration.
Diagram of Brake Parts: How the Wheel End Assembly Fits Together
A labeled diagram of brakes on a car makes it easier to see how the rotor, pad, and caliper line up around the wheel hub. The illustration below shows a typical front disc brake assembly and how the caliper straddles the rotor with the pad sandwiched between them.
Brake Rotor (Disc) Brake Pad Brake Caliper Wheel Hub Mount Brake Hose Connection
Exploded schematic view of a front disc brake assembly, not to exact scale
On the pictured layout, the caliper bridges the outer edge of the rotor and clamps the pad against the flat friction face. A short rubber brake hose links this moving assembly to the fixed steel brake line further up the suspension, which is where fluid pressure originates back at the master cylinder.
Hydraulic System Components: Master Cylinder, Brake Lines, and Brake Fluid
Pressing the pedal does not push a cable directly to each wheel on a modern car. Instead, a hydraulic circuit carries that force through fluid, using a chain of parts that connect the driver to every wheel end assembly.
Brake pedal and pedal linkage transfer foot force into the booster
Brake booster (vacuum or electric) multiplies that force before it reaches the master cylinder
Master cylinder converts mechanical force into hydraulic pressure inside the brake fluid
Steel brake lines and flexible brake hoses carry pressurized fluid out to each wheel
Brake caliper pistons or wheel cylinder pistons convert fluid pressure back into clamping force
The master cylinder itself typically has two separate fluid circuits, so a leak or fault in one circuit still leaves a second, reduced braking circuit available. This dual circuit layout is one of the standard safety principles behind modern brake system design.
Brake fluid is a specialized hydraulic fluid rated to resist boiling under the high temperatures generated at the caliper. Because brake fluid is hygroscopic, meaning it gradually absorbs moisture from the air, manufacturers commonly recommend that it be checked and, when needed, flushed on a scheduled interval rather than left indefinitely, since moisture content lowers the fluid boiling point over time.
Complete Car Brake System Parts List
The table below brings every part covered so far into one reference, organized by where each component sits in the system. Use it as a quick answer to parts of the brakes on a car, brake components, and similar reference questions.
Part
Belongs To
Primary Role
Brake rotor
Disc brake
Friction surface bolted to the hub
Brake pad
Disc brake
Friction material clamped onto the rotor
Brake caliper
Disc brake
Houses pistons that squeeze the pads
Brake drum
Drum brake
Rotating housing around the shoes
Brake shoe
Drum brake
Friction lining pressed against the drum
Wheel cylinder
Drum brake
Pushes the shoes outward hydraulically
Master cylinder
Shared hydraulic system
Generates hydraulic pressure from pedal force
Brake lines and hoses
Shared hydraulic system
Carry pressurized fluid to each wheel
Brake fluid
Shared hydraulic system
Transfers pressure through the circuit
Brake booster
Shared hydraulic system
Amplifies pedal force before the master cylinder
Parking brake cable
Mechanical backup
Holds the vehicle stationary without hydraulics
A consolidated brake system parts list grouped by sub system
Brake Pad Materials: Comparing Organic, Semi-Metallic, Ceramic, and Low-Metallic Pads
Brake materials and parts are closely linked, since the friction compound bonded to the pad backing plate is what determines pedal feel, noise level, and dust output. Automotive brake pads are generally sold in four broad friction material families.
Pad Material
General Characteristics
Typical Use
Organic (non-asbestos)
Softer compound, quieter, wears comparatively faster
Light passenger cars, everyday commuting
Semi-metallic
Strong heat handling, can run louder and dustier
Trucks, SUVs, heavier duty driving
Ceramic
Comparatively quiet, produces lighter colored dust
Passenger cars where noise and dust are a priority
Low-metallic
Firm pedal feel, higher metal content than ceramic
Performance oriented and spirited driving
Common automotive brake pad friction material families
Typical Friction Coefficient Range by Pad Material
Organic approx. 0.35 Semi-Metallic approx. 0.40 Ceramic approx. 0.38 Low-Metallic approx. 0.42 Low High
Illustrative mid-range friction coefficient values, actual figures vary by formulation and test method
Relative Visible Brake Dust Tendency by Pad Material
Organic Semi-Met. Ceramic Low-Met. Low High
General tendency comparison, not a laboratory measurement
Disc Brakes vs Drum Brakes: A Side-by-Side Comparison
Disc brakes and drum brakes are not interchangeable upgrades of one another, they are two different engineering approaches, each with trade offs that make them suited to different positions on a vehicle.
Heat Dissipation Wet Performance Maintenance Access Lighter Weight Stopping Power
Disc brake Drum brake
Illustrative comparison of general engineering characteristics, individual vehicles vary
Disc brakes generally shed heat faster because the rotor is exposed to open air, which helps keep pedal feel more consistent during repeated hard stops. The open design also drains water more readily, which is one reason disc brakes are common at the front axle, where the majority of braking load and heat is generated. Drum brakes, by contrast, enclose the friction surface, which slows heat dissipation but also protects the shoes from road debris and makes it straightforward to build a simple mechanical parking brake into the same housing.
How Many Types of Brake Systems Are There
Brake systems are engineered for very different vehicles and applications, from passenger cars to industrial machinery. The friction hardware discussed above, disc and drum, describes the wheel end layout, while the list below describes the broader operating principle behind how force reaches that hardware in the first place.
Brake System Type
How It Works
Common Application
Hydraulic brakes
Brake fluid transfers pedal pressure to the pads or shoes
Cars and motorcycles
Mechanical brakes
A cable applies braking force directly
Bicycles and many parking brake systems
Pneumatic (air) brakes
Compressed air applies clamping pressure
Buses and heavy trucks
Electromagnetic brakes
Magnetic force resists motion
Electric vehicles and industrial machines
Regenerative brakes
Kinetic energy converts to electrical energy
Electric and hybrid vehicles
Disc brakes
Calipers squeeze pads against a spinning disc
Most modern passenger vehicles
Drum brakes
Shoes press outward against a rotating drum
Rear axles on smaller or older vehicles
Seven broad categories of brake systems by operating principle
Brake Component Wear: How Long Do Parts Typically Last
Brake pad thickness is the single most useful figure for judging remaining service life. New friction material typically measures somewhere around 10 to 12 millimeters, and most manufacturers treat roughly 3 millimeters as the point where the pad should be replaced.


26. Sep. 2026
Hydraulic Braking Explained: Master Cylinders, Wheel Cylinders and Calipers
A brake pedal that sinks halfway to the floor before the vehicle slows down is normally a hydraulic fault, not a friction fault. Pads and rotors can still measure within specification while the hydraulic braking circuit quietly loses its ability to turn pedal force into clamping force. In workshop practice, three causes account for most of these complaints: air trapped in the lines, a seal bypassing internally inside the master cylinder, and fluid escaping past a wheel cylinder cup.
Getting that diagnosis right has commercial weight. A distributor who ships a caliper when the real fault is a leaking wheel cylinder loses a customer, and a technician who fits a new master cylinder without bench-bleeding it creates a comeback. This guide covers how hydraulic braking generates force, where it fails, which fluid specification actually decides performance under heat, and what buyers should verify before ordering OEM-numbered replacement parts.
How Hydraulic Braking Turns Pedal Force into Clamping Force
Every hydraulic braking system follows one chain: leg force on the pedal pad, mechanical advantage through the pedal ratio, hydraulic pressure generated inside the master cylinder, and clamping force applied by the caliper or wheel cylinder. Nothing in that chain depends on electronics, which is why an older vehicle with a healthy hydraulic circuit can still out-brake a newer one with a tired master cylinder.
The force chain in numbers
Passenger-car pedal ratios typically fall between 4:1 and 7:1. Take a 6:1 pedal and 100 N of leg force: the pushrod sees about 600 N. With a 22.2 mm master cylinder bore, piston area is roughly 387 mm squared, so line pressure works out to about 1,550 kPa, or 15.5 bar. Delivered to a two-piston caliper with 4,580 mm squared of total piston area, that produces a theoretical clamp force near 7.1 kN. Double the pedal effort and the clamp force doubles with it.
Pedal force versus caliper clamp force
0 3k 6k 9k 12k 15k 0 100 200 300 400 Caliper clamp force (N) Pedal force (N)
Calculated example: 6:1 pedal ratio, 22.2 mm master cylinder bore, 4,580 mm squared caliper piston area. Real systems lose a few percent to hose swell and seal deflection.
Real systems surrender part of that figure to hose swell, seal deflection and caliper flex. It is the reason braided hoses and stiffer calipers sharpen pedal feel without any change in pad compound, and the reason a soft, bulging hose can feel exactly like trapped air.
Why the front and rear circuits are not equal
Weight transfer means the front axle carries far more grip under braking, so front and rear circuits rarely receive identical pressure. Proportioning valves, load-sensing valves and ABS modulators all exist to stop the rear locking first. When a customer reports a rear-only pull after a hydraulic repair, the proportioning hardware is as likely a suspect as the wheel cylinder that was just replaced.
Hydraulic braking circuit layout
Brake pedal Reservoir Master cylinder Wheel cylinder Brake caliper
Isometric view of a split hydraulic braking circuit: pedal, master cylinder with reservoir, and the two wheel-end actuators.
Where Hydraulic Braking Systems Actually Fail
Failure in a hydraulic braking circuit is predictable rather than random. Four components generate most of the replacement demand in the aftermarket, and each one leaves a distinctive signature that a trained technician can confirm before any part is ordered.
Table 1 - The four hydraulic braking failure points most often seen in aftermarket repair work.
Component
Typical symptom
Confirming check
Usual outcome
Brake master cylinder
Pedal sinks slowly while held at a stop; no fluid on the ground
Cap the outlets, pressurise the body and watch for internal pressure loss
Replace or reseal; bench-bleed before fitting
Brake wheel cylinder
Damp backing plate, fluid loss, uneven braking on one side
Peel back the dust boot and inspect for fluid behind it
Replace the cylinder and the contaminated shoes
Brake caliper
Uneven pad wear, dragging, a hot wheel after a short drive
Compare piston retraction and slide-pin movement on both sides of the axle
Replace or rebuild the caliper as a pair
Hose or hard line
Spongy pedal that returns after bleeding, bulge under pressure
Pressure test and inspect the full length for corrosion at the fittings
Replace flexible hoses in axle pairs
Two patterns are worth remembering. A master cylinder that loses pressure internally leaves no fluid on the ground, so the fault is frequently misdiagnosed as air and the system is bled three times without result. A wheel cylinder that leaks externally contaminates the brake shoes, so replacing the cylinder alone produces a pull that comes back within a few hundred kilometres.
Brake Fluid: The Specification That Decides Behaviour Under Heat
Brake fluid is the only part of the hydraulic braking system that degrades with time rather than distance. Glycol-based fluid is hygroscopic and absorbs moisture through hoses and the reservoir wall; industry guidance commonly puts moisture uptake at around one to two percent per year. That water lowers the boiling point, and once fluid boils the vapour is compressible, so the pedal travels to the floor on a long descent.
FMVSS 116 and the SAE J1703 and J1704 standards set minimum dry and wet boiling points. The wet figure is the one that matters after two or three years of service, because it is measured with the fluid already containing moisture.
Brake fluid boiling points
Dry boiling point (min) Wet boiling point (min) 205 C 140 C 230 C 155 C 260 C 180 C DOT 3 DOT 4 DOT 5.1 50 100 150 200 250 C
Minimum dry and wet boiling points by fluid class, based on FMVSS 116 and SAE J1703 and J1704 requirements.
DOT 5 silicone fluid sits outside this family. It is not glycol-based, it must never be mixed with DOT 3 or DOT 4, and it is generally unsuitable for ABS-equipped vehicles because aeration behaviour and compressibility differ. Where a workshop tops up a silicone system with glycol fluid, the seals usually fail within months.
Table 2 - Fluid classes compared by base chemistry, minimum boiling points and practical suitability.
Fluid
Base
Dry min.
Wet min.
Practical notes
DOT 3
Glycol
205 C
140 C
Common on older Asian and American platforms
DOT 4
Glycol with borate ester
230 C
155 C
Standard specification for most European platforms
DOT 5.1
Glycol
260 C
180 C
Highest glycol performance; ABS compatible
DOT 5
Silicone
260 C
180 C
Never mix with glycol fluid; generally avoid in ABS systems
In practice, match the fluid to the platform rather than to the price list. A two-year flush interval is the norm for glycol fluid, and a system that has never been flushed will boil long before its pads wear out.
Reading the Symptoms in the Right Order
Diagnosis should follow the cheapest checks first. A technician who works through the sequence below will resolve most hydraulic braking complaints without guessing at parts.
Confirm the complaint under load. With the engine running, hold steady pressure on the pedal for thirty seconds. A pedal that keeps sinking points to an internal leak; a pedal that feels spongy but holds points to air.
Check fluid level and colour. A low, dark reservoir suggests a slow external leak. A level that never drops alongside a sinking pedal suggests an internal bypass.
Inspect every wheel. Peel back the dust boots on wheel cylinders and caliper pistons, and look for dampness at hoses, banjo fittings and hard-line unions.
Pressure test the master cylinder. Cap the outlets, apply pressure and watch for loss. This remains the only reliable way to separate an internal bypass from trapped air.
Bleed in the correct sequence, normally starting at the wheel farthest from the master cylinder, and always bench-bleed a new master cylinder before installation.
Road test at low speed before releasing the vehicle, then re-check pedal height after the first heat cycle.
For background on the component at the centre of the circuit, this explanation of what a hydraulic brake master cylinder does covers the bore, port and seal layout in detail.
Sourcing Hydraulic Braking Components for the Aftermarket
For distributors and repair chains, the buying decision usually comes down to identification and consistency rather than brand preference. An OEM number is the only dependable key, because the same physical master cylinder can appear under several platform numbers, and a part that fits a Chevrolet may also carry a Cadillac listing.
20759706 Brake Master Cylinder for Chevrolet Cadillac2009-2012 Chevrolet SilveradoView Product →
Bore diameter and stroke matter more than the mounting flange. A cylinder that bolts up but carries the wrong bore will change pedal travel and front-to-rear balance in ways the driver feels immediately. Seal compound is the second trap: glycol fluid requires EPDM seals, and any mineral-oil elastomer in a glycol circuit will swell and fail.
47510-36170 Brake Wheel Cylinder for ToyotaRecommended ProductsView Product →
Platform coverage is the third consideration. YaniTiger lists hydraulic brake system parts by OEM number across master cylinders, wheel cylinders, calipers and clutch hydraulics, covering European, American, Japanese and Korean vehicles. For a buyer working from a workshop estimate, that breadth reduces the number of suppliers needed on a single purchase order.
104462100 Brake Caliper for TESLARecommended ProductsView Product →
Finally, ask for documentation. ISO 9001 and IATF 16949 certification remains the baseline for OE-adjacent supply, and published pressure and leak test reports make supplier qualification faster. YaniTiger, for example, publishes its brake component test reports 250799-01, 250799-02 and 250799-03 dated 22 October 2025, which buyers can review when assessing a new source.
Frequently Asked Questions About Hydraulic Braking
Q1. What is hydraulic braking and how does it work?
Hydraulic braking uses brake fluid to carry pedal force to the calipers and wheel cylinders. Because fluid is effectively incompressible, pressure created at the master cylinder reaches every wheel almost instantly.
Q2. What are the first signs of a failing brake master cylinder?
A pedal that slowly sinks while held at a stop, a low fluid level with no leak at the wheels, and a spongy feel that returns after bleeding are the classic warning signs.
Q3. What is the difference between DOT 3, DOT 4 and DOT 5.1 brake fluid?
All three are glycol based. DOT 4 and DOT 5.1 carry higher minimum dry and wet boiling points, which matters more on heavy or performance vehicles. DOT 5 is silicone and must not be mixed.
Q4. Why does a brake wheel cylinder start leaking?
Heat, aged rubber cups and contaminated fluid cause the piston seals to lose their grip. Fluid then escapes past the dust boot onto the brake shoes, producing a pull to one side.
Q5. Can I replace a brake caliper without bleeding the whole system?
No. Air enters as soon as the line is opened, so at minimum that wheel must be bled. Many workshops take the opportunity to flush the entire circuit at the same time.
Q6. How often should brake fluid be changed?
Most manufacturers specify every two years regardless of mileage, because glycol fluid absorbs moisture over time. A moisture meter reading is a practical check before a scheduled flush.
.article-section{margin:0 0 28px 0;padding:22px 24px 18px 24px;background:#ffffff;border:1px solid #e3ebf0;border-radius:12px;}
.article-section:nth-of-type(3n+2){background:#f7fbfd;}
.article-section:nth-of-type(3n+3){background:#fbf8f4;}
.article-section h2{font-size:22px;font-weight:bold;text-align:left;margin-bottom:12px!important;}
.article-section h3{font-size:16px;font-weight:bold;text-align:left;margin-bottom:12px;}
.article-section p{font-size:16px!important;margin-bottom:12px;}
.article-section ol{margin-bottom:12px;list-style-type:decimal;list-style-position:inside;padding-left:0;}
.article-section ul{margin-bottom:12px;list-style-type:disc;list-style-position:inside;}
.article-section li{list-style:inherit;font-size:16px;margin-bottom:6px;}
.article-section table{display: table!important;width:100%;border-collapse:collapse;margin:16px 0 8px 0;}
.article-section thead{display: table-header-group!important;}
.article-section tbody{display: table-row-group!important;}
.article-section tr{display: table-row!important;}
.article-section th{display: table-cell!important;font-weight:bold;border:1px solid #cccccc;padding:8px;}
.article-section td{display: table-cell!important;border:1px solid #cccccc;padding:8px;}
.article-section caption{caption-side:bottom;font-size:16px;margin-bottom:12px;font-style:italic;color:#808080;}
.article-section .chart-figure{margin:20px auto;text-align:center;}
.article-section .chart-figure svg{display:block;width:440px;height:auto;margin:0 auto;}
.article-section .chart-caption{font-size:14px;color:#5c6f79;font-style:italic;margin-top:10px;text-align:center;}
.article-section .faq-grid{display:grid;grid-template-columns:repeat(2,minmax(0,1fr));gap:14px;margin-top:16px;}
.article-section .faq-item{padding:14px 16px;border-radius:10px;background:#eaf6fb;border-left:5px solid #1a7fa8;}
.article-section .faq-item:nth-child(2n){background:#fdf2e9;border-left-color:#d97b2b;}
.article-section .faq-item:nth-child(3n){background:#eef7ee;border-left-color:#3f8f4f;}
.article-section .faq-item h3{font-size:16px;font-weight:bold;text-align:left;margin-bottom:8px;}
.article-section .faq-item p{font-size:15px!important;margin-bottom:0;}
@media (max-width:640px){.article-section .chart-figure svg{width:100%;}}
@media (max-width:768px){.article-section .faq-grid{grid-template-columns:1fr;}}
.product-card{display:block;margin:20px 0;border:1px solid #e5e7eb;border-radius:10px;overflow:hidden;font-style:normal;background:#fff}
.pc-inner{display:flex;text-decoration:none;color:inherit;align-items:center;min-height:120px}
.pc-img{width:160px;min-width:160px;aspect-ratio:4/3;height:auto;min-height:120px;object-fit:cover;flex-shrink:0;display:block;align-self:stretch}
.pc-body{padding:12px 16px;flex:1;min-width:0;display:flex;flex-direction:column;align-self:stretch;justify-content:center}
.pc-title{display:block;font-size:15px;font-weight:600;color:#111;margin:0 0 6px;line-height:1.4}
.pc-desc{display:-webkit-box;font-size:13px;color:#6b7280;margin:0 0 8px;line-height:1.5;overflow:hidden;-webkit-line-clamp:2;line-clamp:2;-webkit-box-orient:vertical}
.pc-cta{display:block;font-size:13px;font-weight:600;color:#AE8104;margin-top:auto}
.pc-inner:hover .pc-title{text-decoration:underline}
.article-section a:not(.pc-inner),article a:not(.pc-inner){color:#AE8104}.pc-cta{color:#AE8104!important}


23. Sep. 2026
Understanding Your Parking Brake System: Types, How It Works, and Failure Caus
You have just parked on a steep driveway. You put the gearbox in Park and lift your foot off the brake. The car does not move. That stillness is the work of the parking brake system, not the transmission alone. Every modern passenger vehicle carries a mechanical parking hold because it has to: it must keep a fully loaded car stationary on a substantial hill even if the service brakes lose all hydraulic pressure. This article walks through what a parking brake system is, how its main variants work, and the faults that cause it to let go.
What Is a Parking Brake System?
A parking brake system is a mechanical mechanism that locks the rear wheels so that a parked vehicle stays put. In its traditional form it consists of a driver-operated lever or pedal, steel cables, an equalizer, and the actuating parts inside the rear brakes. Because it works as a direct mechanical connection, it does not depend on the engine running or on hydraulic fluid pressure for a basic hold.
Design targets clarify how much responsibility the system carries: most passenger-vehicle standards expect the parking brake to keep a vehicle from rolling on a slope of roughly 20 percent when fully loaded. That is why a healthy system can secure a car that would otherwise roll down a hill even with the transmission in Park or the engine off.
Note the distinction between the parking brake and the service brake. The service automobile brake system stops a moving car with hydraulic force. The parking brake bypasses that circuit entirely. It is also the reason a car with a failed master cylinder can still be parked securely.
Main components of a cable-operated passenger-car parking brake system.
Component
Role in holding the vehicle
Control (lever, pedal, or button)
The driver input; includes a ratchet or switch that keeps the brake applied
Front cable
Transfers force from the control to the equalizer
Equalizer
Divides force evenly between the left and right rear brakes
Rear cables
Carry the pull into each wheel brake
Actuating lever inside brake
Multiplies cable travel into a clamping or spreading force
Shoes or pads
Generate the friction that locks the drum or rotor
Adjuster and return springs
Compensate for wear and release the brake when disengaged
EPB motor and module (electronic systems)
Replace the manual cable input with motor-driven clamping
How a Parking Brake System Works
All mechanical parking brakes follow the same force path. Pull the hand lever and the ratchet locks the cable in a stretched position. That pull travels through the front cable to the equalizer, which splits it equally to both rear wheels so one side does not clamp harder than the other. Inside each rear brake, the cable moves an actuating lever. On a rear drum brake, the lever spreads the two shoes into the drum, and friction locks the wheel. On a rear disc brake with an integrated parking brake, the lever rotates a screw or cam in the caliper to push the brake pads against the rotor. When you release the lever, return springs pull everything back and the wheels turn freely.
Electronic parking brakes (EPBs) replace the cable path with an electric motor mounted on the rear caliper or on a cable-puller unit. The motor drives a ball-screw or gear mechanism that presses the piston directly against the pads. The button maintains the applied state, and a separate motor or clutch release lets the pads retract.
Because the parking brake is a static device, its job begins after the car has stopped. The correct technique on a steep gradient is to hold the foot brake, apply the parking brake, and only then shift into Park. This takes load off the transmission pawl and puts it on the part designed to hold it.
Hand lever in cabin Equalizer Rear drum / caliper Rear drum / caliper Cable-operated rear parking brake layout (isometric view)
Two of the most important components to inspect when a parking brake loses its bite are at the wheel: the caliper on disc-rear vehicles and the wheel cylinder on drum-rear vehicles. A caliper whose piston sticks or whose parking lever seizes will not apply or release cleanly. Replacement calipers that match the original part number are the first choice for a repair that has to last.
68019137AA 2E0615424 Brake Caliper for Rear Disc Parking BrakeThis replacement caliper matches the original part number for rear disc systems, addressing sticking pistons or seized parking levers that reduce parking brake bite. A dependable choice when caliper condition is the suspected fault.View Product →
On drum-brake rears, the wheel cylinder sits on the same backplate as the parking brake lever. A slow fluid seep reduces the friction area and often shows up first as a car that creeps on a slope. Wheel cylinders such as the 47510-36170 for Toyota rear axles are commonly replaced together with the shoes so the drum side of the system is done in one job.
47510-36170 Rear Brake Wheel Cylinder for ToyotaPositioned on the same backplate as the parking brake lever, this wheel cylinder suits drum-brake rears. A slow fluid seep can weaken braking, so pairing it with new shoes ensures the drum side is serviced at once.View Product →
Main Types of Parking Brakes
Center or stick lever
The classic handbrake is still common in smaller cars, sports models, and pickup trucks. The lever offers high mechanical advantage, gives the driver direct feel, and is simple to adjust. Its weak point is the cable: with age, corrosion and stretching increase the number of clicks before engagement.
Foot pedal
The foot pedal is familiar in many American and Japanese SUVs, minivans, and light trucks. The driver presses a pedal near the door sill and releases it by pulling a small handle. It saves cabin space but is harder to modulate, and the mechanism is more prone to sticking if left unused for weeks.
Electronic parking brake (EPB)
The EPB is becoming the default on new cars because it frees floor space, enables auto-hold in traffic, and can be actuated by electronic stability systems. Most EPBs apply via a motor on the rear caliper; a few still pull a cable. The downsides are higher repair cost for the actuator and dependence on battery voltage.
0 20 40 60 80 100 Electronic Center lever Foot pedal 64% 21% 15% Illustrative shares based on published production-mix estimates for new passenger cars, 2025
Comparison of parking brake control types in typical passenger vehicles.
Feature
Center lever
Foot pedal
Electronic
Driver input
Pull up, press button to release
Press and latch, pull handle to release
Press button
Engagement feedback
Mechanical clicks
Click or ratchet feel
Warning light and motor hum
Typical location
Floor console
Door sill area
Center console or dashboard
Main failure points
Cables, ratchet
Cables, release handle
Actuator, switch, battery
Repair cost level
Low to moderate
Low to moderate
Higher, needs special tools
How Air-Braked Vehicles Park Differently
Trucks and buses do not use hand levers and cables. Their parking brake is a spring brake chamber mounted on the rear axle. Powerful springs hold the brakes applied by default, and compressed air releases them for normal driving. When the driver exhausts the air, the springs apply. This fail-safe design is why a parked air-brake truck cannot creep and why air pressure loss doubles as the emergency braking strategy. For fleet maintenance, the priority is air dryer and spring chamber inspection rather than cable adjustment.
How parking brake systems differ between hydraulic passenger cars and air-braked heavy vehicles.
Aspect
Passenger hydraulic
Truck or bus air
Energy source
Cables or electric motor
Coil springs plus air pressure
Fail-safe behavior
Manual apply by driver
Springs apply automatically on air loss
Parking force
Rear shoes or pads
Spring chamber on rear axle
Warning indicator
Brake light or fade feel
Low-air alarm, brake drag
Common Parking Brake Problems and Maintenance
The most dangerous failure is not a brake that refuses to apply; it is a brake that holds on flat ground but fails on a hill. An analysis of shop-reported parking brake complaints in 2024 showed "does not hold on an incline" as the largest single category, ahead of seized cables and excessive lever travel.
0 10 20 30 40 34% 26% 18% 12% 10% Won't hold on a hill Cable seized Lever travel too far Warning light on Rear brake drag Illustrative distribution based on published aftermarket workshop summaries, 2024
Most frequent root causes
Seized or rusted cables after road-salt exposure
Stretched cables or worn pulley bushings
Sticking caliper levers on disc-rear vehicles
Contaminated or glazed brake linings
Failed EPB actuators or drained vehicle batteries
Signs the system needs attention
The car rolls on a slope even with the parking brake fully applied
The lever pulls higher than the manufacturer's specification, commonly 7 to 9 clicks
The brake warning light stays on after release
The pedal or lever feels springy, or the release handle does nothing
A grinding or dragging noise comes from the rear at low speed
Maintenance is straightforward. Use the parking brake every time you park; regular use keeps the cables free. Have cable adjustment checked whenever rear brakes are serviced, and replace friction material before it reaches the wear limit. For EPB systems, rear pads are checked through the same diagnostic routines, and worn pads directly increase motor current and stress the actuator. The same logic applies to a full hydraulic brake inspection: understanding your brakes is the first step to catching a small problem before it becomes a safety issue.
Rear brake pads are the contact point of caliper-operated parking brakes, so pad choice affects both stopping power and parking hold. Quality disc brake pads built to the original geometry and friction range bed in consistently and keep the parking brake force predictable through the life of the pad.
0449135160 Disc Brake Pad for Foton, Toyota, and VWQuality rear brake pads influence both stopping power and parking hold in caliper-operated systems. Built to original geometry and friction range, they promote consistent bedding and predictable parking brake force throughout pad life.View Product →
Parking Brake FAQ
Is a parking brake the same as an emergency brake?
It is the same hardware under a different name. Its primary job is to hold the car when parked, but it also provides a mechanical backup if the hydraulic service brakes fail. Because it acts only on the rear wheels, it is far less effective at speed and should never be pulled hard while driving.
Should I use the parking brake every time I park?
Yes. On automatic cars, regular use keeps the cable and caliper mechanism free and prevents the transmission parking pawl from carrying the whole load of the car. On manuals, EVs, and hybrids, it is also part of the normal parking routine.
Why does my parking brake not hold on a hill?
The usual causes are a stretched cable, a misadjusted equalizer, or worn rear friction material. In drum brakes the self-adjuster may simply need servicing. Test on a safe slope with the brake fully applied; if the car still creeps, inspect the cable path and the rear brake linings.
Can the electronic parking brake fail?
Yes, though less often than cables. EPB failure usually comes from a worn actuator motor, a faulty switch, low battery voltage, or rear brake pads past their limit. If the EPB warning light stays on, read the fault codes before ordering any parts.
Does the parking brake use the same brake pads as the service brake?
On disc-rear cars with caliper-integrated parking brakes, yes: the same pads press the rotor. Drum-in-hat systems use small separate shoes inside the hub, while older full-drum rears share the same shoes with the service brake. Check your rear brake layout before buying parts.
How much does a parking brake repair cost?
A cable replacement is usually far cheaper than replacing a caliper or an EPB actuator. The final cost depends on labor rates and whether drums, shoes, or pads are included. Get a written estimate based on an actual diagnosis instead of authorizing parts ahead of time.
.article-section table{display:table!important;}
.article-section thead{display:table-header-group!important;}
.article-section tbody{display:table-row-group!important;}
.article-section tr{display:table-row!important;}
.article-section th{display:table-cell!important;}
.article-section td{display:table-cell!important;}
.article-section table{width:100%;border-collapse:collapse;margin:16px 0 8px;background:#ffffff;}
.article-section table caption{caption-side:bottom;font-size:16px;margin-bottom:12px;font-style:italic;color:#808080;padding-top:8px;}
.article-section th{font-weight:bold;border:1px solid #cccccc;padding:8px;background:#f0f4f8;text-align:left;}
.article-section td{border:1px solid #cccccc;padding:8px;}
.article-section ol{margin-bottom:12px;list-style-type:decimal;list-style-position:inside;padding-left:0;}
.article-section ul{margin-bottom:12px;list-style-type:disc;list-style-position:inside;}
.article-section li{list-style:inherit;font-size:16px;margin-bottom:6px;}
.article-section h2{font-size:22px;font-weight:bold;text-align:left;margin-bottom:12px!important;color:#1f4e5f;border-left:4px solid #1f4e5f;padding-left:10px;}
.article-section h3{font-size:16px;font-weight:bold;text-align:left;margin-bottom:12px;color:#2d6a7e;}
.article-section p{font-size:16px!important;margin-bottom:12px;line-height:1.6;}
.article-section .chart-wrap{display:flex;justify-content:center;margin:18px 0;}
.article-section .chart-wrap svg{width:440px;height:auto;}
.article-section .iso-wrap{display:flex;justify-content:center;margin:18px 0;}
.article-section .iso-wrap svg{width:440px;height:auto;}
.article-section .faq-grid{display:grid;grid-template-columns:1fr 1fr;gap:14px;margin:18px 0;}
.article-section .faq-item{background:#f5f8fb;border-radius:10px;padding:16px 18px;border-top:4px solid #2f7ea0;}
.article-section .faq-item:nth-child(even){background:#fdf6f0;border-top-color:#c07a3b;}
.article-section .faq-item h3{font-size:15px;margin-bottom:6px;color:#1f4e5f;}
.article-section .faq-item p{font-size:15px!important;margin-bottom:0;}
.article-section a[data-product-card]{display:inline-block;}
@media (max-width:640px){
.article-section .chart-wrap svg,.article-section .iso-wrap svg{width:100%;height:auto;}
.article-section .faq-grid{grid-template-columns:1fr;}
}
.product-card{display:block;margin:20px 0;border:1px solid #e5e7eb;border-radius:10px;overflow:hidden;font-style:normal;background:#fff}
.pc-inner{display:flex;text-decoration:none;color:inherit;align-items:center;min-height:120px}
.pc-img{width:160px;min-width:160px;aspect-ratio:4/3;height:auto;min-height:120px;object-fit:cover;flex-shrink:0;display:block;align-self:stretch}
.pc-body{padding:12px 16px;flex:1;min-width:0;display:flex;flex-direction:column;align-self:stretch;justify-content:center}
.pc-title{display:block;font-size:15px;font-weight:600;color:#111;margin:0 0 6px;line-height:1.4}
.pc-desc{display:-webkit-box;font-size:13px;color:#6b7280;margin:0 0 8px;line-height:1.5;overflow:hidden;-webkit-line-clamp:2;line-clamp:2;-webkit-box-orient:vertical}
.pc-cta{display:block;font-size:13px;font-weight:600;color:#AE8104;margin-top:auto}
.pc-inner:hover .pc-title{text-decoration:underline}
.article-section a:not(.pc-inner),article a:not(.pc-inner){color:#AE8104}.pc-cta{color:#AE8104!important}
















 English

